lae's notebook

Installing Redmine 1.4 on cPanel Shared Hosting

Redmine 1.4.6 (and earlier) can be installed in a shared environment. This article will detail the easiest and most reliable method of getting a Redmine instance set up on a shared cPanel web hosting account, using mod_passenger instead of Mongrel.

I wrote this article a while ago when cPanel 11.32 was the most recent version, which used Rails 2.3.14, but most of it should still apply with cPanel 11.36 and Rails 2.3.17. Redmine 2.2 requires Rails 3.x, and as a result is not likely to be supported on shared servers (though with root access, you could set up Rails 3 in a server using cPanel, but that's beyond the scope of this article).

This article was also written for a HostGator shared hosting account, so I can't vouch for other providers like DreamHost, so please feel free to contact me letting me know if this setup works on other providers using cPanel (as I'd like to believe).

Note: Ensure that you have SSH access enabled on your account before proceeding! You will need to be somewhat familiar with using SSH before you install Redmine in any way. Please see "How do I get and use SSH access?" for more information.

Step 1 - Setup database and subdomain

Go to your cPanel (this is the only time you will need to), and create a database to be used for your Redmine. See "How do I create a MySQL database..." for more information. You can also reference the following screenshot:
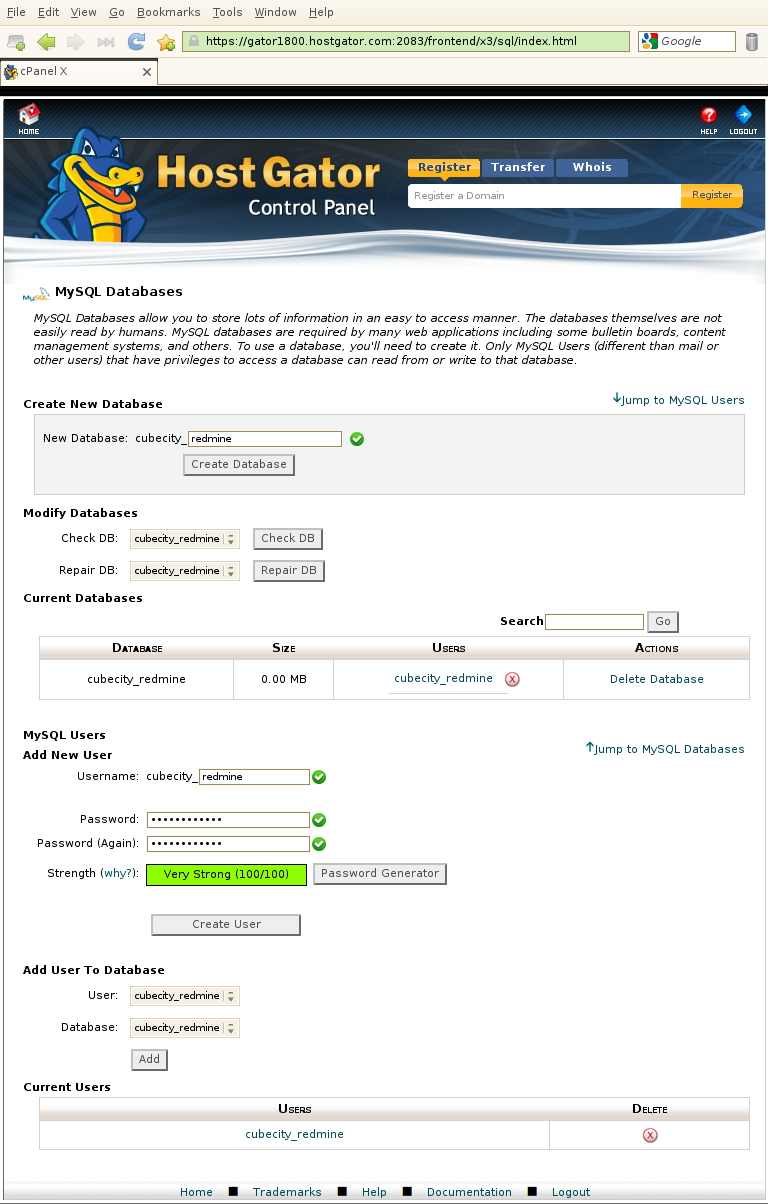
Creating a Database in cPanel

We'll call ours cubecity_redmine. Be sure to save your password, as you'll need it later on.

Next, create a subdomain and point it to the public directory of where you will place your Redmine instance. We'll be using rails_apps/redmine/public in this example:
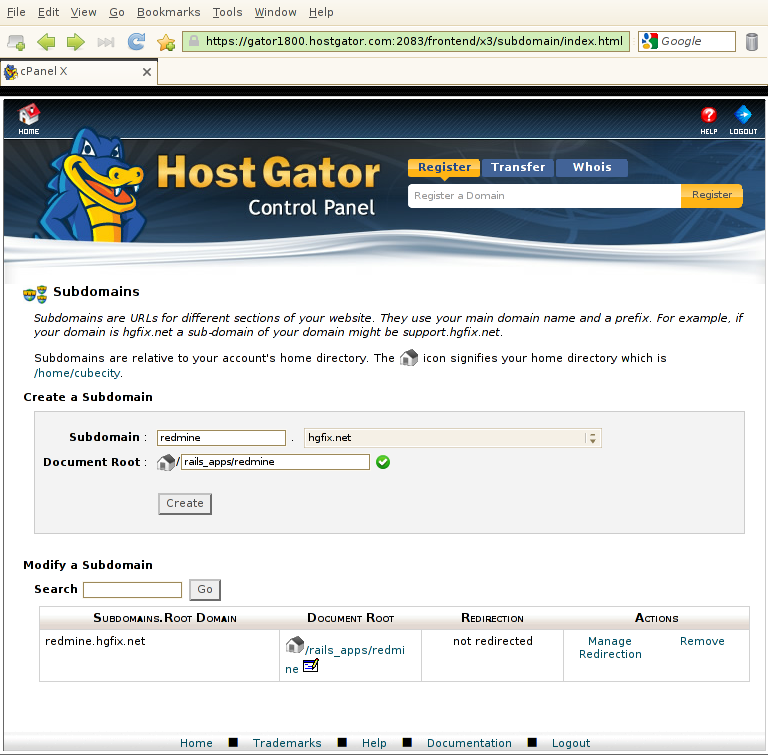
Creating a Subdomain in cPanel

Note: It is not necessary to use a subdomain - you can definitely use a subdirectory or your primary domain, just be sure to make the appropriate changes. For simplicity and ease of maintenance, we will use a subdomain in this article.

Now that we have these set up, let's start configuring our environment for Rails applications.

Step 2 - Setup your Rails environment

Connect to your account via SSH. The following should look similar to where you're at now:

A terminal after connecting via SSH

We will now want to edit our shell's environment variables, so that it knows where to find our ruby gems. You can use any text editor - we'll use nano in our examples. Type the following:

nano ~/.bash_profile

This will open up the nano editor. You will want to add or ensure that the following variables are in your .bash_profile:

export GEM_HOME=$HOME/.gem/ruby/1.8
export GEM_PATH=$GEM_HOME:/usr/lib/ruby/gems/1.8
export PATH=$PATH:$HOME/bin:$GEM_HOME/bin
export RAILS_ENV=production
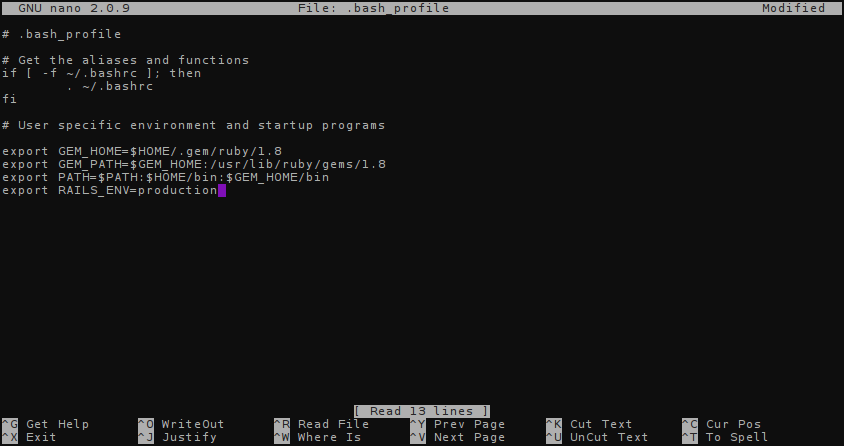
The contents of .bash_profile as shown in nano

You can navigate the file using your arrow keys. Save it by pressing Ctrl+X (by pressing Ctrl and the X key at the same time). It may ask to save your changes, so press y and then click enter to save it.

After this, type the following so that your environment variables are reloaded from your profile:

source ~/.bash_profile

Now we will want to edit our rubygems configuration file. Open .gemrc in nano as you did with .bash_profile above.

---
gem: --remote --gen-rdoc --run-tests
gemhome: /home/cubecity/.gem/ruby/1.8
gempath:
 - /home/cubecity/.gem/ruby/1.8
 - /usr/lib/ruby/gems/1.8
rdoc: --inline-source --line-numbers
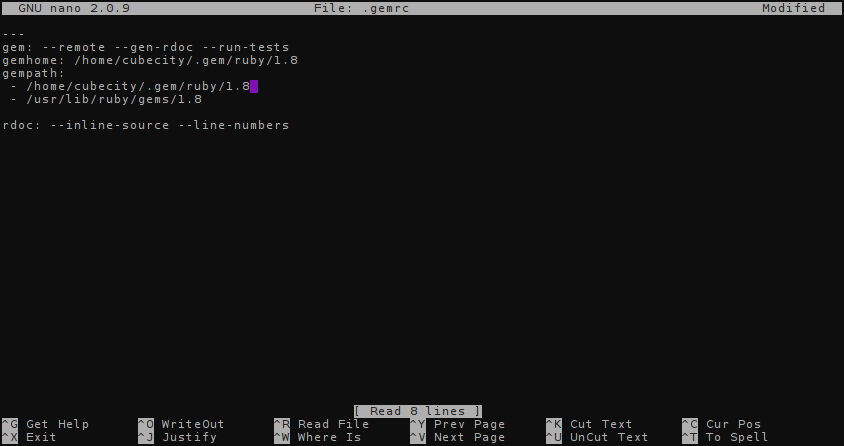
The contents of .gemrc as shown in nano

If the file is empty, type all of the above. Ensure that your gempath and gemhome keys use your own username. Mine is cubecity in the above, so just replace that. Save the file using Ctrl+X after you are done.

That's it! Your environment is set up, so now let's go into downloading and installing Redmine.

Step 3 - Download and Install Redmine

Let's first move out the folder created by cPanel when we went to make a subdomain. Run the following commands:

cd rails_apps
mv redmine oldredmine

Now we want to download the latest version of Redmine 1.4. Visit the RubyForge page for Redmine and find the tarball for latest Redmine. We'll use 1.4.4 as that is the latest at this time of writing, and download it directly to the server like below:

wget http://rubyforge.org/frs/download.php/76255/redmine-1.4.4.tar.gz

You will then want to extract the tarball. Use the following to extract it:

tar xzvf redmine-1.4.4.tar.gz

Your session should look similar to this before you extract the file:
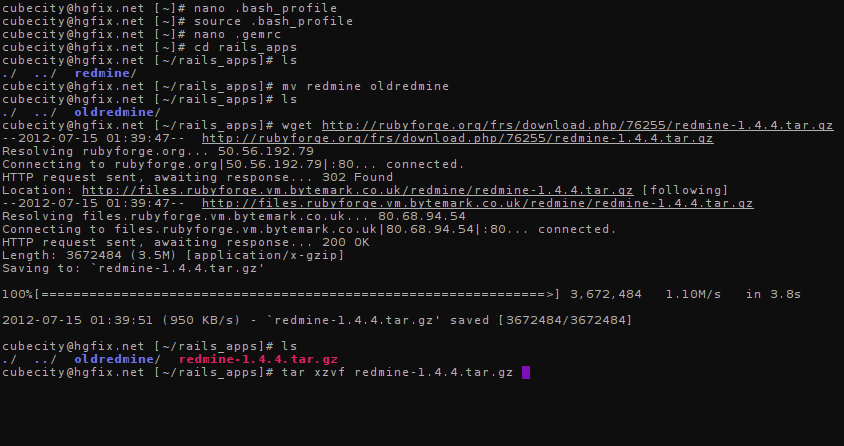
Terminal prior to executing the tar command

After you've finished untarring the download, rename your extracted directory to redmine using the mv command and go into that directory:

mv redmine-1.4.4 redmine
cd redmine

We will be using Bundler to install Redmine's dependencies. Bundler should be available on the shared server, but if it is not, you can locally install a copy by running gem install bundler. As we will be using MySQL, issue the following:

bundle install --without development test postgresql sqlite

Your session should now look like this:
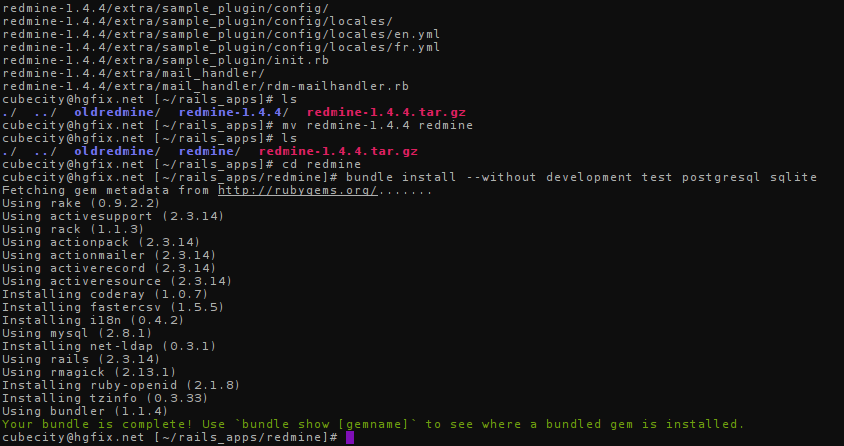
Terminal after installing a bundle for Redmine

Redmine's installed! Now let's finish up and configure it...

Step 4 - Configure Redmine

Copy over the example database configuration provided by Redmine and start editing it, like below:

cp config/database.yml.example config/database.yml
nano config/database.yml

Edit your configuration for the production environment with the database name, user, and password you created at the beginning of this tutorial:
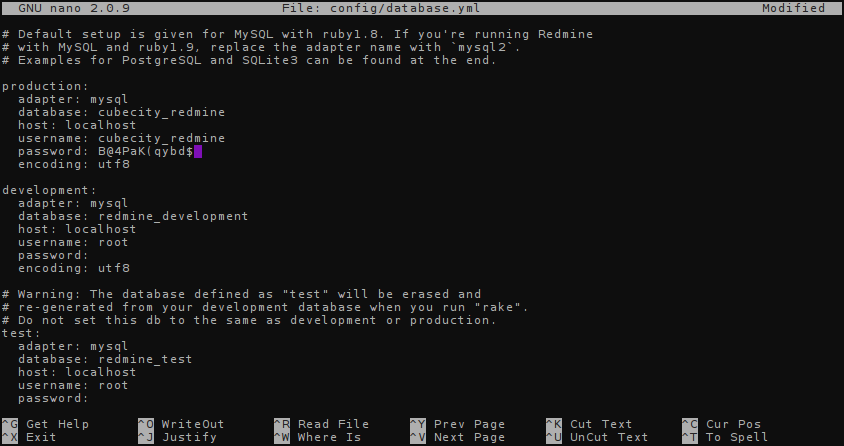
The contents of database.yml as shown in Nano

Press Ctrl+X to save. Now let's run our initial Rake tasks to create a secret and set up your database's tables:

rake generate_session_store
rake db:migrate
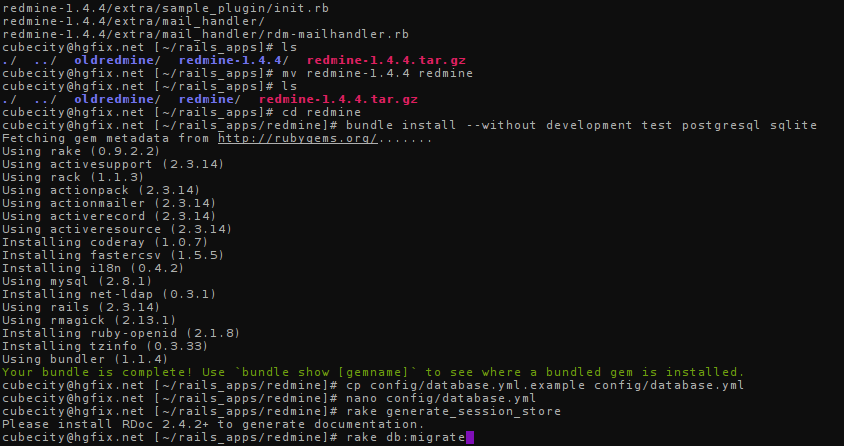
Terminal before running rake db:migrate

Finally, we will edit our .htaccess so that mod_passenger can handle requests for your Redmine instance:

nano public/.htaccess

Add the following two lines:

Options -MultiViews
RailsBaseURI /

Press Ctrl+X to save, and you're done! Visit the subdomain you created in step 1, and your Redmine installation should be handling requests as normal.

This method requires no stopping or starting of services, however if you find (very rarely this will occur) that you need to restart your app, create a restart.txt file in your application:

touch tmp/restart.txt

The application will restart the next time it is loaded in a browser.

Have fun resolving bugs!

Tremulous 2 and Unvanquished

It looks like the folks over at AAAGames have recently picked up one of my most played games when I was in high school, Tremulous. It's basically a first-person shooter set in a space-like arena (usually, though there are some maps on the contrary), but the catch is that one team consists of aliens while the other consists of humans. The gameplay significantly differs between the two teams, and aliens are especially unique as they are unable to use weaponry (so humans primarily attack from range while aliens are melee). Tremulous also allows you to build structures to assist allies and impede opponents, which is where team strategies come into play.

The original developers of Tremulous have all but stopped development on this game. Due to this, the playerbase has stagnated significantly. A few groups have picked up where they basically left off and started developing new games like Unvanquished and TremZ. TremZ seems to have fallen off the face of the planet now, though, without a release.

Unvanquished is still in alpha, but it is playable and has gained popularity lately. It's runs on the Daemon engine, developed in house as a Quake 3 engine with XreaL features. New models were introduced, and you can also play against AI. It remains open source and moddable. Their forum is pretty active.

AAAGames have also started developing Tremulous 2. It looks like they will be recreating it from scratch on Unreal Engine 3 (the original uses ioquake3), with new artwork. It appears, though, that Tremulous 2 will not be open source or free to play. That personally puts me off from the game, since it basically removes the chance of porting the KoRx mod to Tremulous 2. They also are not going to support Linux, which in itself is a seriously bad move considering the Tremulous playerbase consisted of several Linux users. If you're interested in contributing to it, they have started a Kickstarter campaign to raise money. That page is also pretty lengthy about what they're planning to make.

So, to recap, here are the differences between the two:

  • UV is open source, while Trem2 is not.
  • Both will be using different models
  • Trem2 claims to be like the original (physics and balance wise I believe), UV has made changes where needed. I haven't seen how Trem2 is pulling this off specifically, since it looks pretty different from the original.
  • UV uses a combination of ioquake3 and XreaL, Trem2 uses Unreal Engine 3
  • Trem2 does not support Linux.
  • UV is free to play, Trem2 is not.
  • UV is moddable, Trem2 lets you mod skins but not the gameplay.
  • UV has a release already. Trem2 has an estimated release timeframe of Q4 2014.
  • Trem2 has an in-game shop that handles real money for user-created mods, amongst other things.

Using SCP to Provide a Public Upload Service

Half a year ago, I wrote a poorly detailed post about setting up a public upload site using SSH, which used the authorized_keys file to restrict the key to an rsync command with certain flags enabled and a specified destination directory. This was pretty poorly implemented so I ended up removing the upload script and private key to prevent abuse.

Some time ago I did look into finding solutions to prevent all the mishaps that could have happened with that method. I ended up writing a pass-through bash script that basically parses the command sent to the SSH server, checks that the input is sane and then executes it.

The Implementation

To start things off, here's the result:

#!/bin/bash -fue
set -- $SSH_ORIGINAL_COMMAND # passes the SSH command to ARGV
up='/home/johndoe/example.jp'
function error() {
    if [ -z "$*" ]; then details="request not permitted"; else details="$*"; fi
    echo -e "\aERROR: $details"
    exit
}
if [ "$1"  != 'scp' ]; then error; fi # checks to see if remote is using scp
if [ "$2" != "-t" ]; then error; fi # checks flags for local scp to retrieve a file
shift
shift
if [[ "$@" == '.' ]]; then error "destination not specified"; fi # checks that the command isn't scp -t .
if [[ "$@" == ../* ]] || [[ "$@" == ./* ]] || [[ "$@" == /* ]] || [[ "$@" == */* ]] || [[ "$@" == .. ]]; then
    error "destination traverses directories"
fi
dest=$up$@
if [[ -f "$dest" ]]; then error "file exists on server"; fi
exec scp -t "$dest"

We'll make this executable and place it at /home/johndoe/bin/restrict.sh. The following line should then be appended to /home/johndoe/.ssh/authorized_keys:

no-port-forwarding,no-X11-forwarding,no-pty,command="/home/johndoe/bin/restrict.sh" $PUBLICKEY

Of course, replace $PUBLICKEY with a valid public key (you should create a key pair that doesn't require a password to use, but that's up to you). Then, we basically use SCP to upload a file. For the restrict.sh script I provided above, you'll need to actually specify the destination file (because scp runs with '.' as the destination, and that could very well be the entire directory locally):

scp (-i $pathtoprivatekey) $srcfile johndoe@example.jp:$destfile

You can also write a script (like I have) or use an alias to make this simpler to perform on an everyday basis.

The Explanation

The comments in the script should explain what happens for the most part, but I'll reiterate here. I begin by defining the variables to be used throughout the script. $SSH_ORIGINAL_COMMAND is a variable provided by OpenSSH to the program specified by the command parameter in your authorize_keys file, which contains the command issued remotely. I use set here primarily to reduce the amount of code I have to write (it basically does the splitting of the variable for me). up is then defined to specify where files will be uploaded to (and in this case I use a directory accessible via HTTP).

The error() function is defined to return a message to the person sending a request to the server and then exit. I included an escaped alarm beep only because it seems that the 'E' disappears if I don't put anything other than an 'e' in front. (I tried removing it now and, for some reason, it works fine, so it might have just been a bug with an older SSH client from last year.)

The next two lines then check to see if the command being executed is scp with the t flag specified - this is the server counterpart to the scp command. After that's done, I use shift to remove the first two arguments.

$@ should then include the remaining arguments, which in most cases will be the destination file. Flags like the recursive flag r seem to get specified before t so this will prevent entire directories from being uploaded (it also prevents usage of the verbose flag, but you could add more logic to check). $@ is then matched against any patterns that would allow the destination to be any other directory than the one specified by the up variable defined earlier (it also matches root, but then again, you wouldn't use this script with root, would you?).

We then check to see if the destination file exists, and proceed to upload it if it does not.

Things to be Concerned About

There are a few serious issues with this approach, however. You'd want to implement a check for how much disk space is available on the server, and possibly prevent uploads if the disk is 90% full or so. The issue with this is that SCP doesn't pass any other metadata about the file being uploaded, so you can't check to see if uploading the file would cause the disk to become 100% full and cause server wide problems (of which you may not even be aware that this script could be the source of the issue).

You would also want to implement a flood check within the script. This could be pretty simple: you could have a data store that keeps track of files, dates of when the files were uploaded, and the size of files (after they were uploaded, of course), and then you could check to see how many files were uploaded in the last 30 minutes or count how much data was transferred in that time, and prevent any uploads for a limited amount of time. This could be an effective deterrent, but it won't stop floods with an extended duration (in other words, it's not difficult to write a while true loop that runs scp every minute on a randomly generated file). Since SCP doesn't even pass the IP of the uploader, you can't deny requests to certain IPs (well, I suppose you could parse netstat, but that doesn't seem like a reliable, effective method).*

In short, I would only use this to provide a service to friends and others I can trust not to abuse it. If either of those two problems have a solution I'm not aware about, I'm open to suggestions (and new knowledge, of course).

* (update 5 Mar) I just realised a week ago that SSH actually does pass the SSH_CONNECTION and SSH_CLIENT environment variables containing the sender's IP, so one should be able to track uploads via IP within the script easily. I'll see what I can do about the other issue.

Restructuring

Update 2/15:

This site received it's makeover for the most part. I'm going to be spending the next few days still making changes to the style of certain elements and other things (the code snippets specifically come to mind). If you have suggestions, feel free to email me.

There are a few items on my backlog for new articles, so I'll be working on those soon. I should also probably start looking for a job....

Previously, on Milk Tea Fuzz:

I'm (finally) in the process of redesigning this site. The journal entries will probably be stashed into one corner of the site by then. Anyway, I've brought up the old site instead of leaving a never ending 503 page up. Some posts will be purged (mostly because they've become irrelevant) or rewritten - we're just going to have to wait and see, aren't we?

It's almost time to wave bye to Totoro....

Meanwhile, enjoy whatever it is that brought you here!

Mailserver, DNS Changes and More

This weekend was pretty productive for me. I've set up Postfix and Dovecot both on this server so now I'm serving mail from @milkteafuzz.com (primarily because I wanted to send texts/email from my server itself). I've also now configured my IRC client to send me texts whenever I'm away and highlighted or messaged, following Michael Lustfield's Irssi to SMS article for the most part.

In addition to the kyoto.maidlab.jp (see my previous post), I've moved my DNS to afraid.org's nameservers for milkteafuzz.com, and currently in the process of transferring clkwkornj.com to NearlyFreeSpeech (I've used them for about 5 years now - they're great) and will be hosting its DNS on afraid.org, also.

I am set to move to Chicago in about a month (and consequently leaving my job, sadly) and once I do I'll probably start setting things up out of my apartment. My friend's started up a survival minecraft server at Knights of Reason but hasn't set up a creative server. I might end up making one. Might.

Zmonitor 1.0.11 has also been released and is now available from the repo at rubygems.org, so you can just run gem install zmonitor. 1.0.12 is probably rolling out soon but I won't make an announcement for it until the next major update, and hopefully it will be some sort of an interactive shell to work from.

Seeing how pretty I made kyoto.maidlab.jp I'm a bit inspired to redesign this site, so I might do that sometime soon. For now though, time to sleep. Possibly.