Redmine 1.4.6 (and earlier) can be installed in a shared environment. This article will detail the easiest and most reliable method of getting a Redmine instance set up on a shared cPanel web hosting account, using mod_passenger instead of Mongrel.
I wrote this article a while ago when cPanel 11.32 was the most recent version, which used Rails 2.3.14, but most of it should still apply with cPanel 11.36 and Rails 2.3.17. Redmine 2.2 requires Rails 3.x, and as a result is not likely to be supported on shared servers (though with root access, you could set up Rails 3 in a server using cPanel, but that's beyond the scope of this article).
This article was also written for a HostGator shared hosting account, so I can't vouch for other providers like DreamHost, so please feel free to contact me letting me know if this setup works on other providers using cPanel (as I'd like to believe).
Note: Ensure that you have SSH access enabled on your account before proceeding! You will need to be somewhat familiar with using SSH before you install Redmine in any way. Please see "How do I get and use SSH access?" for more information.
Step 1 - Setup database and subdomain
Go to your cPanel (this is the only time you will need to), and create a database to be used for your Redmine. See "How do I create a MySQL database..." for more information. You can also reference the following screenshot:
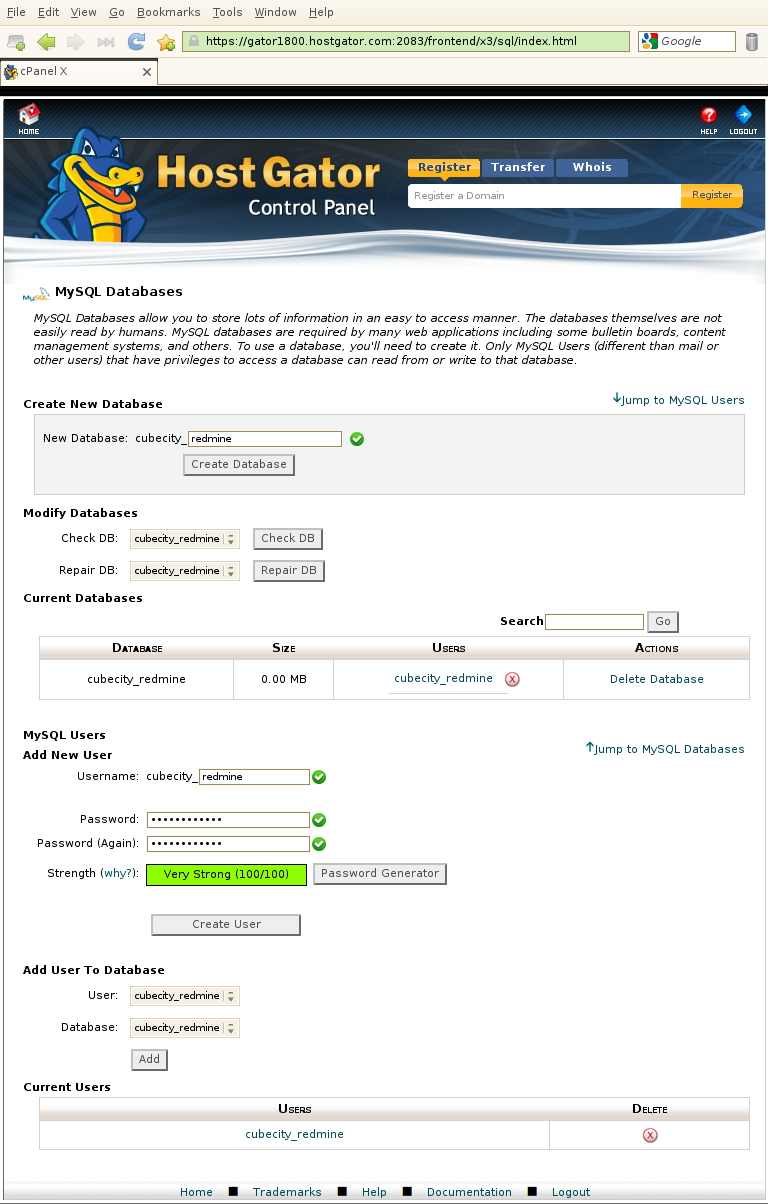
We'll call ours cubecity_redmine. Be sure to save your password, as you'll need it later on.
Next, create a subdomain and point it to the public directory of where you will place your Redmine instance. We'll be using rails_apps/redmine/public in this example:
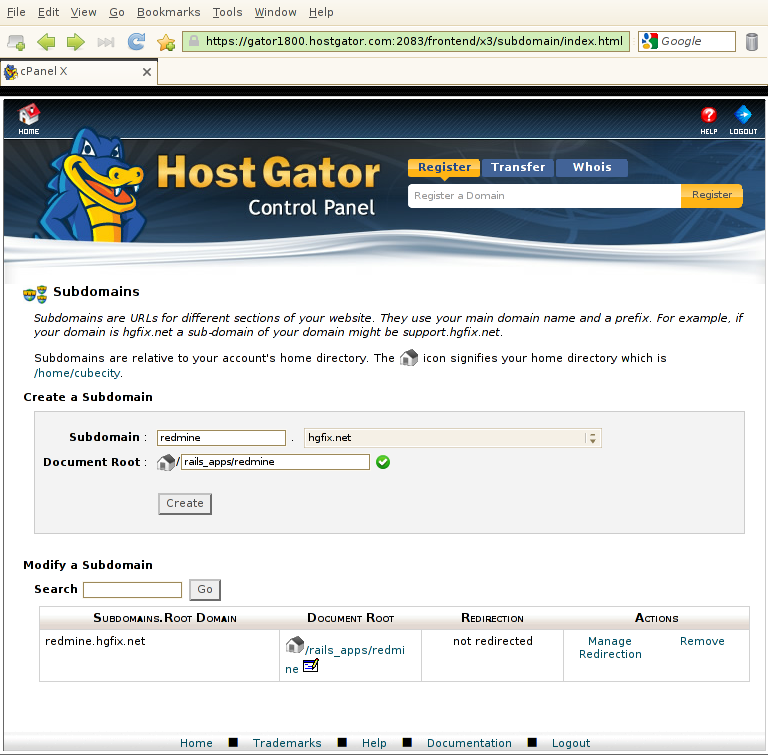
Note: It is not necessary to use a subdomain - you can definitely use a subdirectory or your primary domain, just be sure to make the appropriate changes. For simplicity and ease of maintenance, we will use a subdomain in this article.
Now that we have these set up, let's start configuring our environment for Rails applications.
Step 2 - Setup your Rails environment
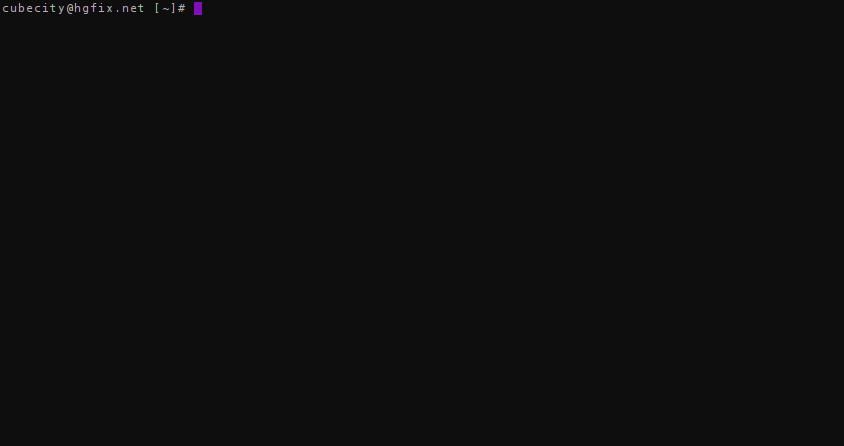
Connect to your account via SSH. The following should look similar to where you're at now:
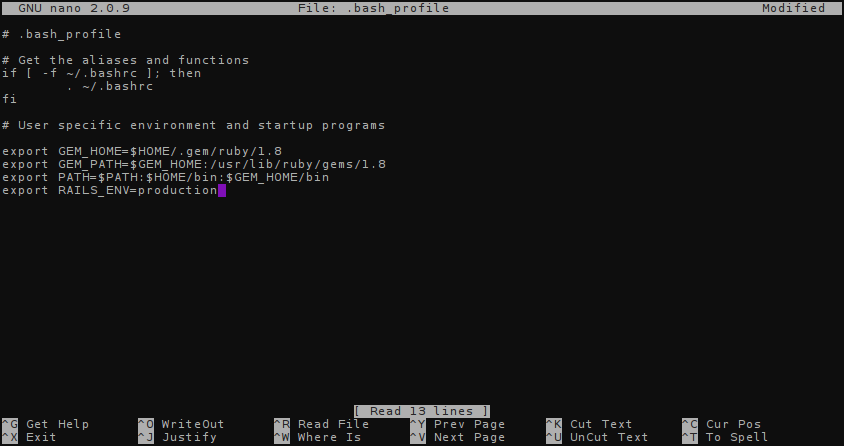
We will now want to edit our shell's environment variables, so that it knows where to find our ruby gems. You can use any text editor - we'll use nano in our examples. Type the following:
nano ~/.bash_profile
This will open up the nano editor. You will want to add or ensure that the following variables are in your .bash_profile:
export GEM_HOME=$HOME/.gem/ruby/1.8
export GEM_PATH=$GEM_HOME:/usr/lib/ruby/gems/1.8
export PATH=$PATH:$HOME/bin:$GEM_HOME/bin
export RAILS_ENV=production
You can navigate the file using your arrow keys. Save it by pressing Ctrl+X (by pressing Ctrl and the X key at the same time). It may ask to save your changes, so press y and then click enter to save it.
After this, type the following so that your environment variables are reloaded from your profile:
source ~/.bash_profile
Now we will want to edit our rubygems configuration file. Open .gemrc in nano as you did with .bash_profile above.
---
gem: --remote --gen-rdoc --run-tests
gemhome: /home/cubecity/.gem/ruby/1.8
gempath:
 - /home/cubecity/.gem/ruby/1.8
 - /usr/lib/ruby/gems/1.8
rdoc: --inline-source --line-numbers
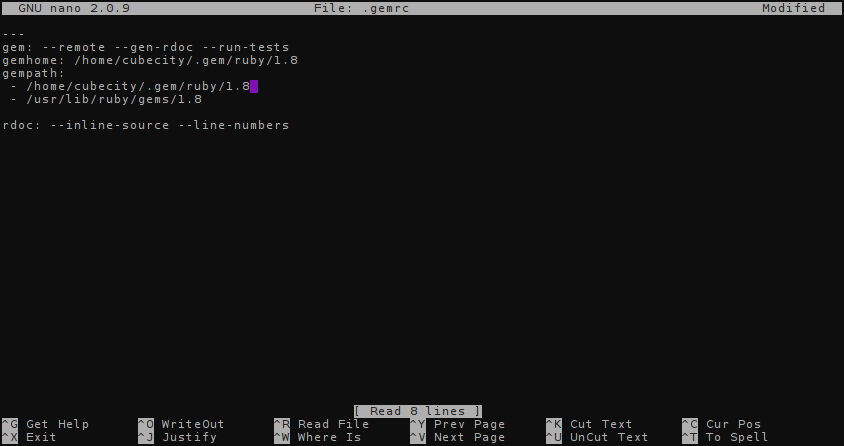
If the file is empty, type all of the above. Ensure that your gempath and gemhome keys use your own username. Mine is cubecity in the above, so just replace that. Save the file using Ctrl+X after you are done.
That's it! Your environment is set up, so now let's go into downloading and installing Redmine.
Step 3 - Download and Install Redmine
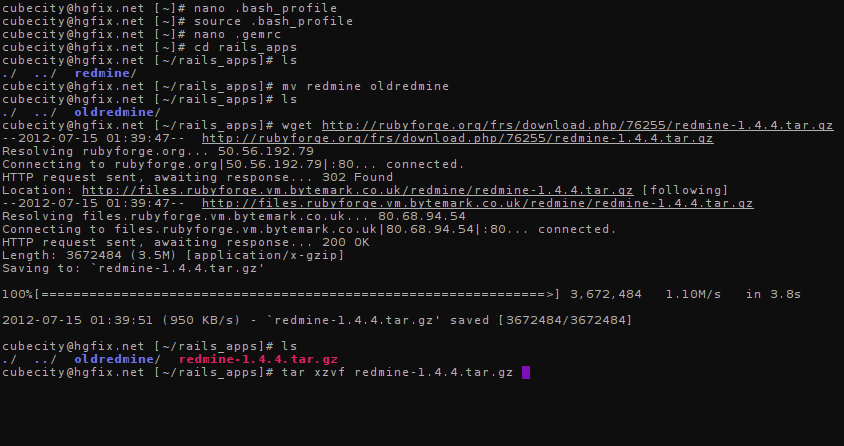
Let's first move out the folder created by cPanel when we went to make a subdomain. Run the following commands:
cd rails_apps
mv redmine oldredmine
Now we want to download the latest version of Redmine 1.4. Visit the RubyForge page for Redmine and find the tarball for latest Redmine. We'll use 1.4.4 as that is the latest at this time of writing, and download it directly to the server like below:
wget http://rubyforge.org/frs/download.php/76255/redmine-1.4.4.tar.gz
You will then want to extract the tarball. Use the following to extract it:
tar xzvf redmine-1.4.4.tar.gz
Your session should look similar to this before you extract the file:
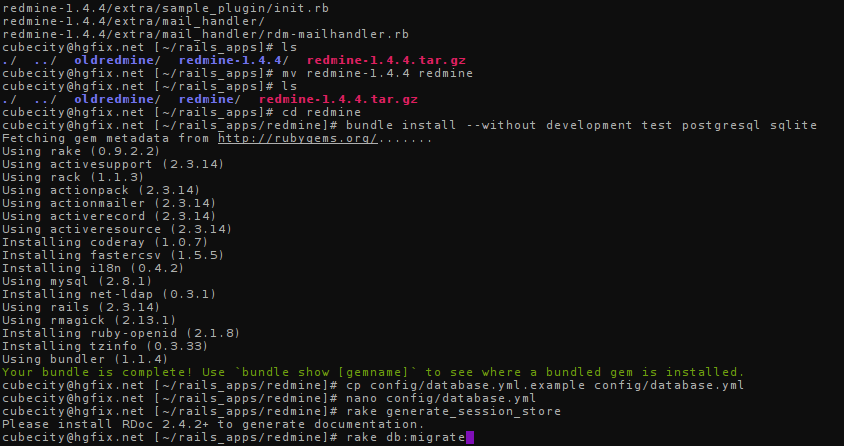
After you've finished untarring the download, rename your extracted directory to redmine using the mv command and go into that directory:
mv redmine-1.4.4 redmine
cd redmine
We will be using Bundler to install Redmine's dependencies. Bundler should be available on the shared server, but if it is not, you can locally install a copy by running gem install bundler. As we will be using MySQL, issue the following:
bundle install --without development test postgresql sqlite
Your session should now look like this:

Redmine's installed! Now let's finish up and configure it...
Copy over the example database configuration provided by Redmine and start editing it, like below:
cp config/database.yml.example config/database.yml
nano config/database.yml
Edit your configuration for the production environment with the database name, user, and password you created at the beginning of this tutorial:
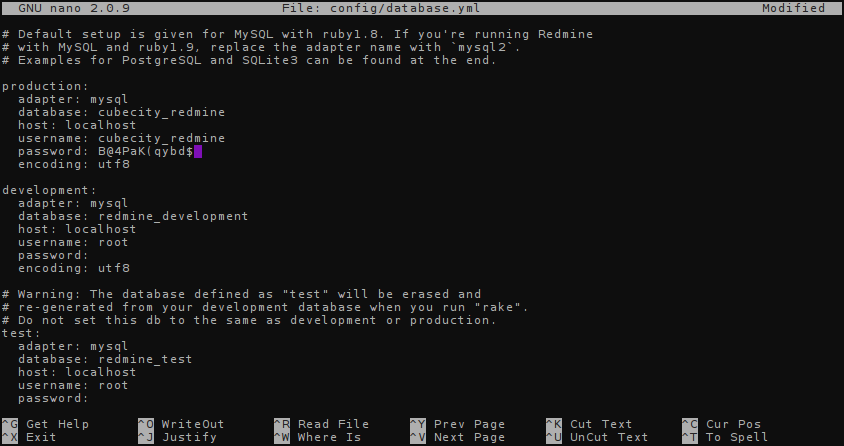
Press Ctrl+X to save. Now let's run our initial Rake tasks to create a secret and set up your database's tables:
rake generate_session_store
rake db:migrate
Finally, we will edit our .htaccess so that mod_passenger can handle requests for your Redmine instance:
nano public/.htaccess
Add the following two lines:
Options -MultiViews
RailsBaseURI /
Press Ctrl+X to save, and you're done! Visit the subdomain you created in step 1, and your Redmine installation should be handling requests as normal.
This method requires no stopping or starting of services, however if you find (very rarely this will occur) that you need to restart your app, create a restart.txt file in your application:
touch tmp/restart.txt
The application will restart the next time it is loaded in a browser.
Have fun resolving bugs!